Hello! It’s been such a long time since I mentioned it no doubt everyone has forgotten; but at the beginning of this year I made a wedding dress for my daughter-in-law Lainey!
It was quite a journey! first we went for the customary wedding-dress try-on together with Lainey’s parents; and after taking time and consideration to really narrow down the style that Lainey wanted, we all headed for the fabric store… Interestingly we ended up with basically the same style of dress that Lainey had very first sketched down, right at the very beginning before any shopping!
We started out with V9328 as a starting point but of course there was a loot of adjustments to the pattern. I ended up making four or maybe five muslins of the bodice; I’ve lost count now… Lainey wanted for the bodice to be quite close-fitting as well as a low-cut V both front and back, and no to a corset; I really wanted to get that as right as I possibly could. However any dressmaker will tell you that that sort of style is quite the challenge. I think I managed to get the front as low cut as we could within those guidelines!
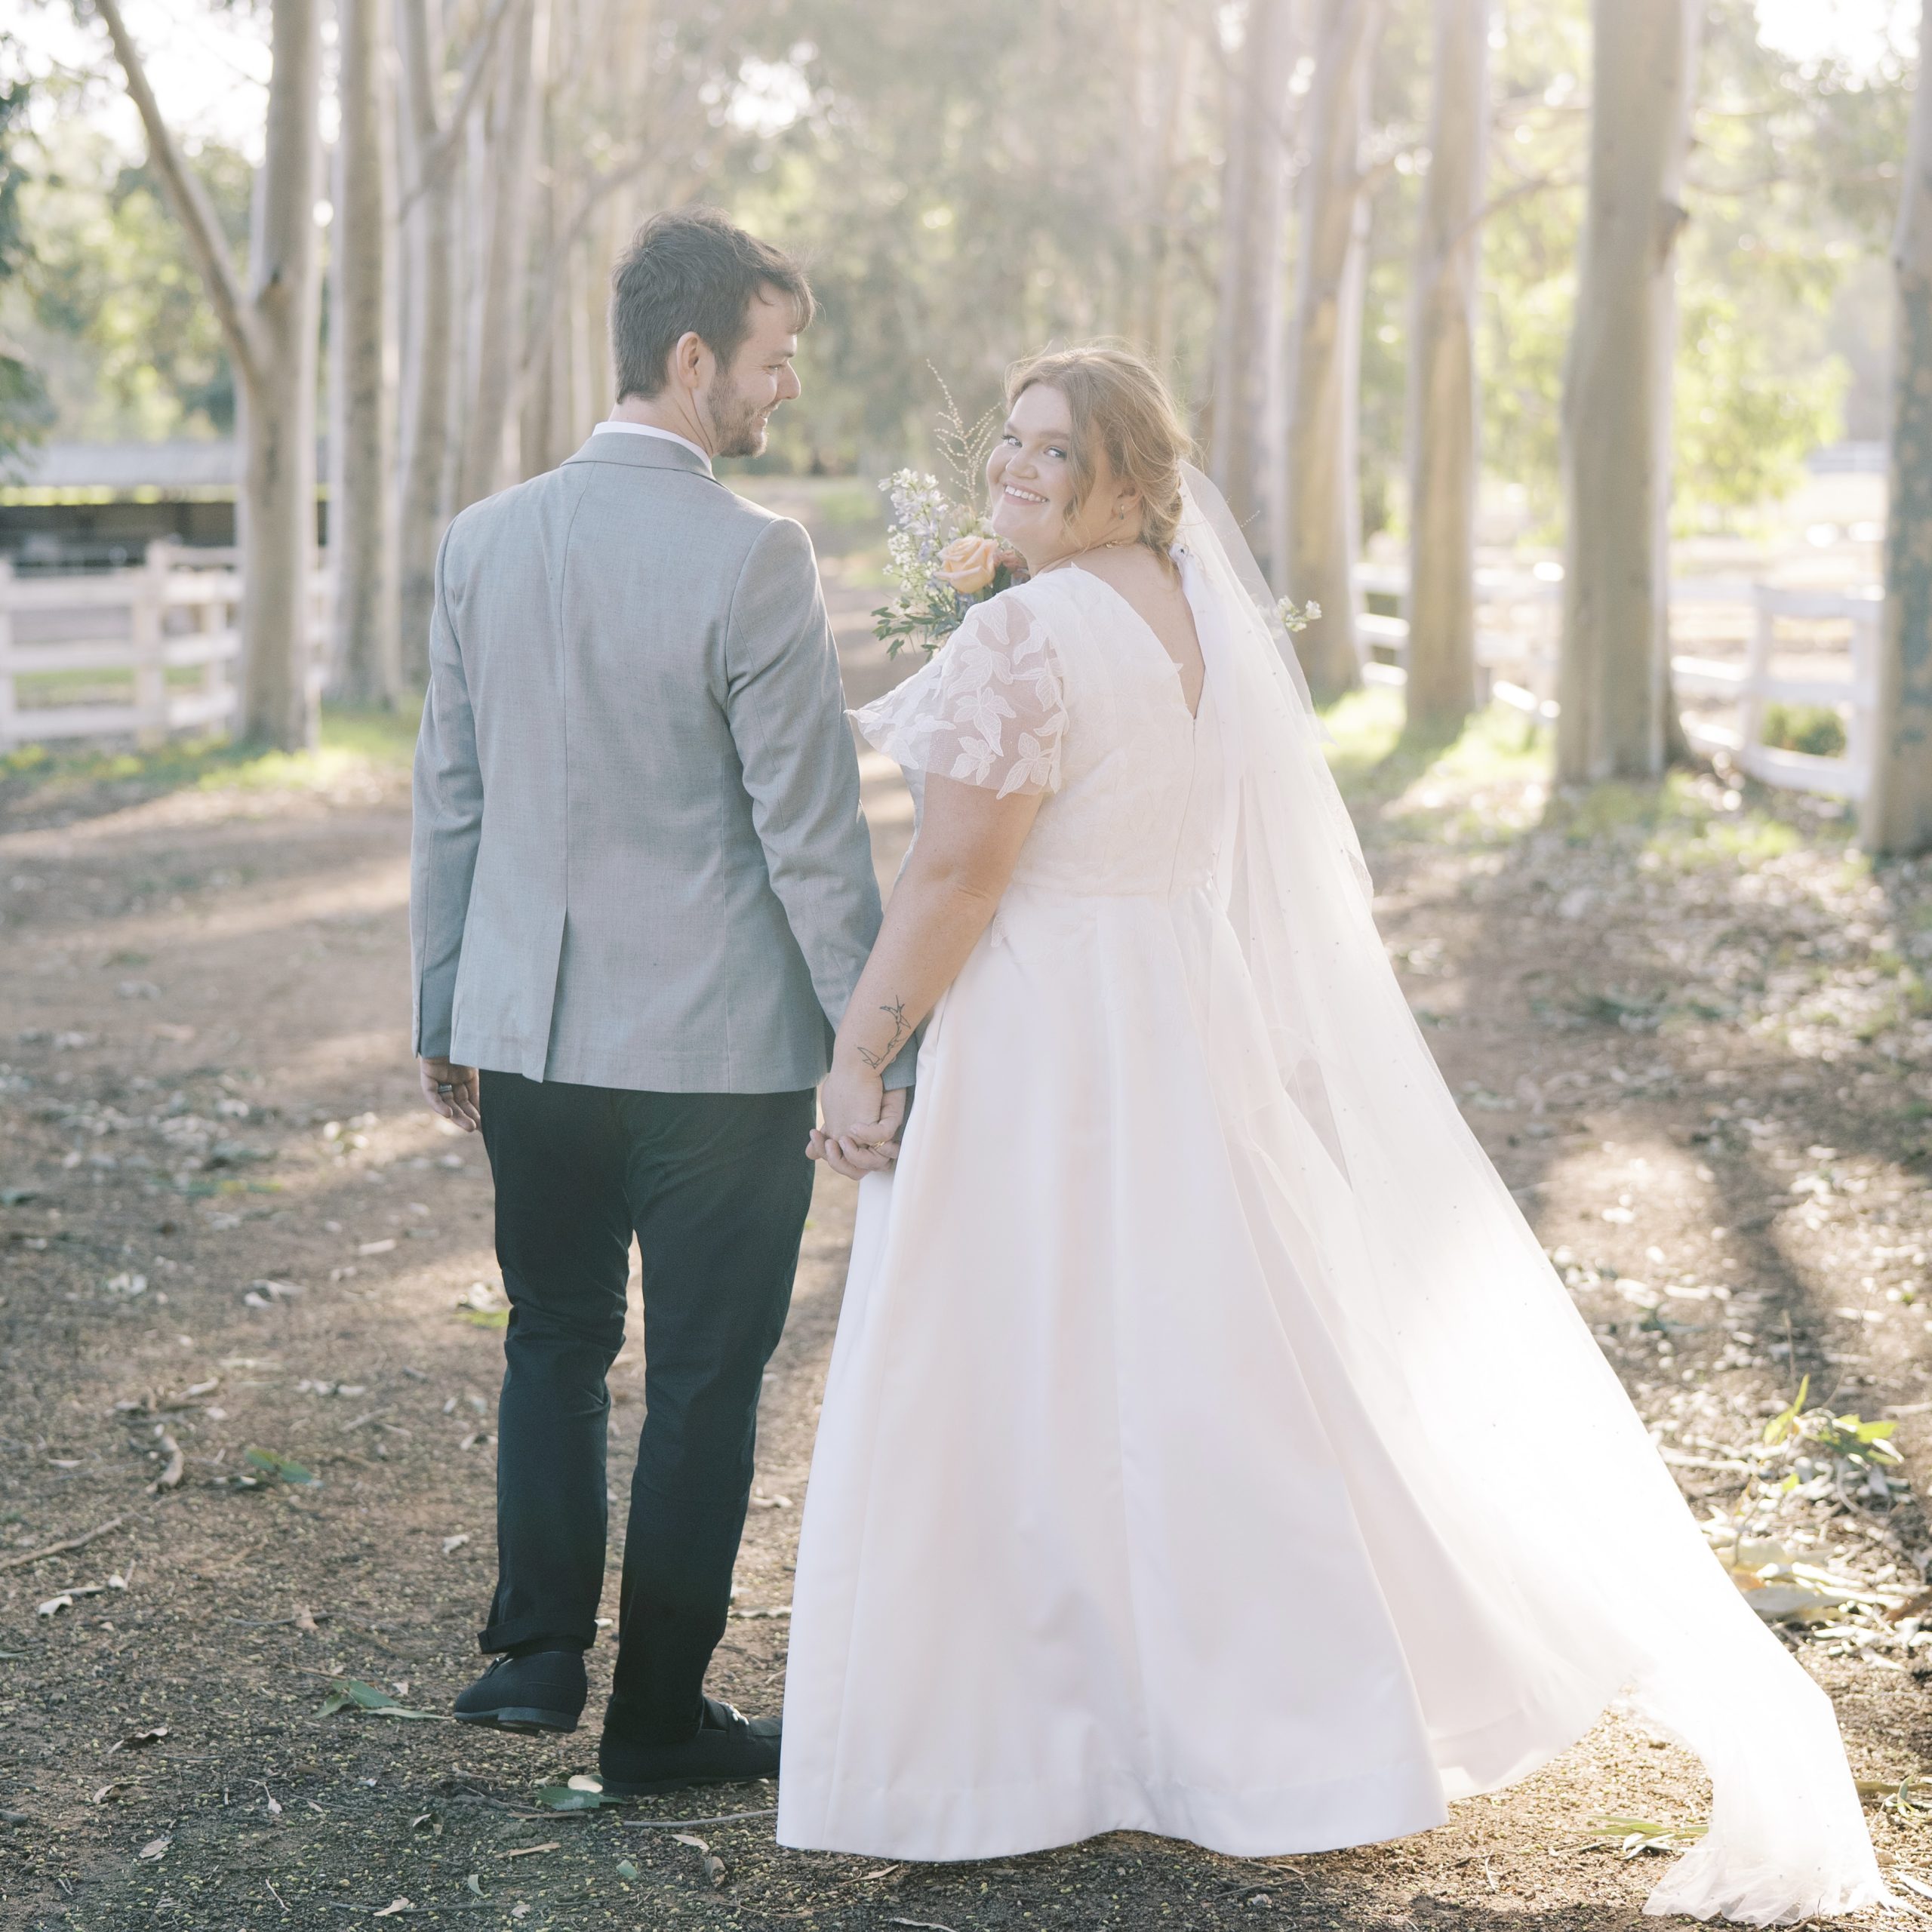
The body of the dress itself is a medium-weight, slightly matte white satin. Lainey wanted white-on-white, a lacy bodice, translucent sleeves with lace, and for a bit of sparkle on the bodice as well… I got this effect by overlaying the bodice with a layer of sparkly tulle, and then hand-stitching the lace motifs free-form over the top of this. The sleeves are just the sparkly tulle, with lace motifs artfully hand-sewn over. Those sleeves just about drove me mad… but I’ll get to that later….
The lace that Lainey chose was absolutely exquisite… leaves sewn on quite lightweight tulle in a free-form very naturalistic style… some of them were only partially sewn on so lifted off the tulle in a sort of 3D way; and Lainey wanted this look on her dress as well.
So, multiple calico muslins later and I finally got started on the dress itself. I carefully constructed the bodice with the sparkly tulle overlaid, and added the skirt. Then came the long long part, hand-cutting, arranging and hand-stitching all those lace-y leaves…. I do enjoy this part, it’s artistically very satisfying while being quite technical challenging, and absolutely a hugely time-consuming activity. I know it took well over 100 hours because I got through literally every one of the 152 BTS Run episodes on YouTube, plus a lot of other content too…
I aimed to get the leaves artistically arranged, curling around each other with just the right amount of spacing to be sorta evenly arranged while also looking organic. I left a few curling up and away from the bodice, as Lainey wanted, but not on the front part of the bodice where I decided it looked a little funny.
yes it has pockets!
I also had the lace motifs coming down over the waistline to disguise that seam between sparkly tulle and no sparkly tulle. I carefully arranged the leaves to cover the seam as much as possible while trying to keep it organic.
I’m extremely happy with how the lace turned out. I do have to say that the artistic side of me sorta pined for a not-white background colour that enabled the lace to stand out a bit more visually because you have to get up really close to even see it. However, technically I do think it turned out really beautiful and I’m exceptionally proud of this.
I don’t think I took a picture of this? here’s a slightly blurry one from the professional wedding photographer… I constructed a grosgrain ribbon belt hidden between the dress and lining just like I did with both Kelly and Cassie’s dress – you can just see it peeking out at the bottom right of the picture; and also a blue hand-embroidered plaque for their wedding date.
I absolutely love this picture…
Oh! I haven’t even mentioned those sleeves yet! Yes, they were a tiny nightmare. btw if you don’t want to read any sewing-related whinging; stop now and just enjoy the pretty pictures! Rest assured it all turned out alright in the end!
look at my handsome boys…! #heartisbursting. btw, Tim (at right) made the wedding arch for his own wedding to Kelly…
OK, sleeves… For a start, we had already made drastic adjustments to the original, extremely fluttery sleeves of the pattern, to get them down to an acceptable level of flutter. Then I made them in the sparkle-y tulle, and stitched on the leaves. I was pretty happy with how it was all looking. At almost the finish line Lainey tried the dress on again, and thought the sleeves still too fluttery. I had already added the lining by this point, and so you can just imagine… I could have happily run away from home at that point. (jk). Anyway, I managed it. I carefully took leaves off from the top of the sleeves and then cut out a wedge of tulle. Then hand-stitched an almost invisible seam along the top of the sleeves to close the gap, and rearranged the leaf motifs to cover it.
The other big adventure was the hem. You know when you’re at the finish line and you’re like; oh, only the hem to go! It’s basically finished! WELL! Fate had other ideas…. I had allowed a fabulously deep 10cm for the hem. I had done the same for Cassie’s dress and it turned out absolute perfect… however this fabric was completely different. Firstly, I bound the edge with lightweight bias cut muslin; which looked really nice of course. Then I stitched up the hem. And it looked absolutely terrible. The hem just wouldn’t ease into place nicely at all and it looked bumpy and fluted on the outside. At first I thought the muslin binding might be a little heavy or even overstretched? though I had been careful, so I painstakingly removed all the binding and just stitched an overlocked edge in place… same problem. I realised then that it was a feature of the fabric itself… it just had too much body and would never ever ease in… fortunately I had enough leftover fabric that I thought I could make a facing. I held my breath and, heart in mouth, cut off the lovely deep hem. A deeply scary moment! I made a pattern for, and cut out a hem facing from the leftover fabric, stitched it on, understitched. Then turned up and stitched the facing up. It looked way way better; however even though I had taken tiny stitches you could still see every single one very clearly all the way around. There was just something about that fabric; each stitch was like a distinct dimple on the surface. I (for like the third? time) unpicked, and finally achieved success by just hand-picking up the scantest of scant, single thread with each stitch of the hem. Honestly, any more than a single thread and you could see it standing out like a sore thumb on the outside. Absolutely amazing! I am fairly happy with the final look of the hem; but it was Quite a Business.
I’ve just remembered another thing that was quite difficult… I had cut the dress lining at the same time that I cut the bodice, meaning after (as I thought) perfecting the fit from multiple muslins. But of course there were subsequently still multiple tiny changes to the bodice itself, and by the time I got to attaching the lining I had long lost track of all such tiny little changes. In the end much of the lining was actually hand stitched in place.
Anyway; the final result was very very satisfying, as you can imagine all such very intensive and emotional projects always are. I think Lainey looked absolutely glorious in her dress and it gave me immense joy to see both Lainey and Sam glowing with happiness and love on the day.
wedding photographs: Amelia Claire photography
hair; Ree Meraki on Beaufort
make-up: Melody @ Luxury Makeup House
flowers: Kisschasey Weddings
Dress; made by ME!
venue: Brookleigh Estate
The post Lainey’s wedding dress appeared first on Handmade by Carolyn.


