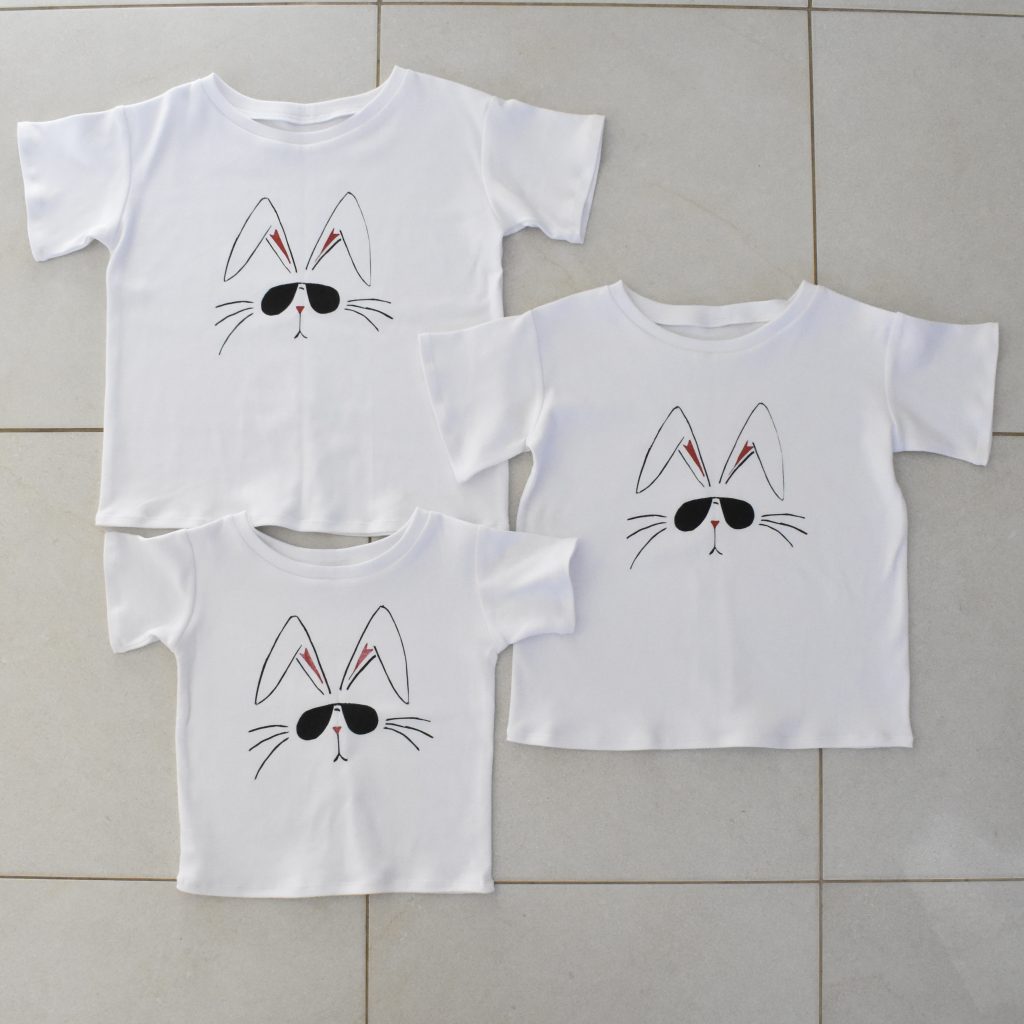
Hello! For the Easter just gone by I wanted to give something to my three little grandsons… chocolate has been ruled out by the parents and so I had to think of something else. I decided upon this! As a teen, my eldest Tim used to have a pink T-shirt with a “cool bunny” printed on it which he absolutely loved. It was actually a very different print from this one, but with this in mind I googled “cool bunny” and something like this was one of the millions that came up. I thought it was really cute!
The following is my process… I’d done a screen printing course years ago and so already had all the materials on hand. Most of my old paints had dried up but fortunately the red and black were ok. Phew!
I hand-drew the design on tracing paper in lead pencil, then transferred the designs to equally sized pieces of wrapping paper.
Why wrapping paper? Well, because it’s a little stiff and “waxy” in texture I thought it would last a little longer in the printing process, and hopefully not disintegrate after a few prints. Yes I could have gone out to buy proper printing paper but I’m still on a “use what I’ve got in the house already” kick. I’d pre-cut the paper pieces to be the exact same size, in the hopes of being able to overlay the two colours as perfectly as possible.
Using a scalpel, from my shoemaking kit, I cut out the two designs. I’d also cut out four pieces of white cotton jersey (from stash) big enough for a T-shirt front. Four pieces? but I only have three grandsons? well I was accounting for one possibly not working out well since I wasn’t going to easily be able to do all this a second time! Screenprinting is quite involved!
To help line up the prints, I’d drawn the corners on the white cotton jersey in disappearing ink. As it turned out, this didn’t work out well at all because the edges of the paper are stuck down to the screen with masking tape which then obviously also masks the corners drawn on the cotton jersey underneath. So of course you can’t see them. I mean, duh! It was actually pretty difficult to line up the screen for the red print afterwards. I’m going to have to put my thinking cap on for future multi-colour prints.
First print done!
I’d cut the black with little “bridges” to keep the design actually together, so after printing I went over with a paintbrush and carefully filled in the bridges.
Second print!
These are the three that worked pretty well…
and this one did not. If you can’t see it straight away, just look at the red, inside-the-ears bit, and you can see how skewiff it is compared the the others. I’ve still got this fabric, and may use it for something else in the future.
Heat set the prints, and then I sewed up the T-shirts.
I used Butterick 5510 for G’s T-shirt above, that I’d used for him previously…
and for A’s and T’s I’d traced around a child’s T-shirt and adapted it to their sizes as well as I could. I deliberately made them all oversized so they could grow into them, but they did all turn out pretty big. Fortunately all the boys seem to like them and have worn them, so I’m happy!
The post “cool bunny” T-shirts appeared first on Handmade by Carolyn.


