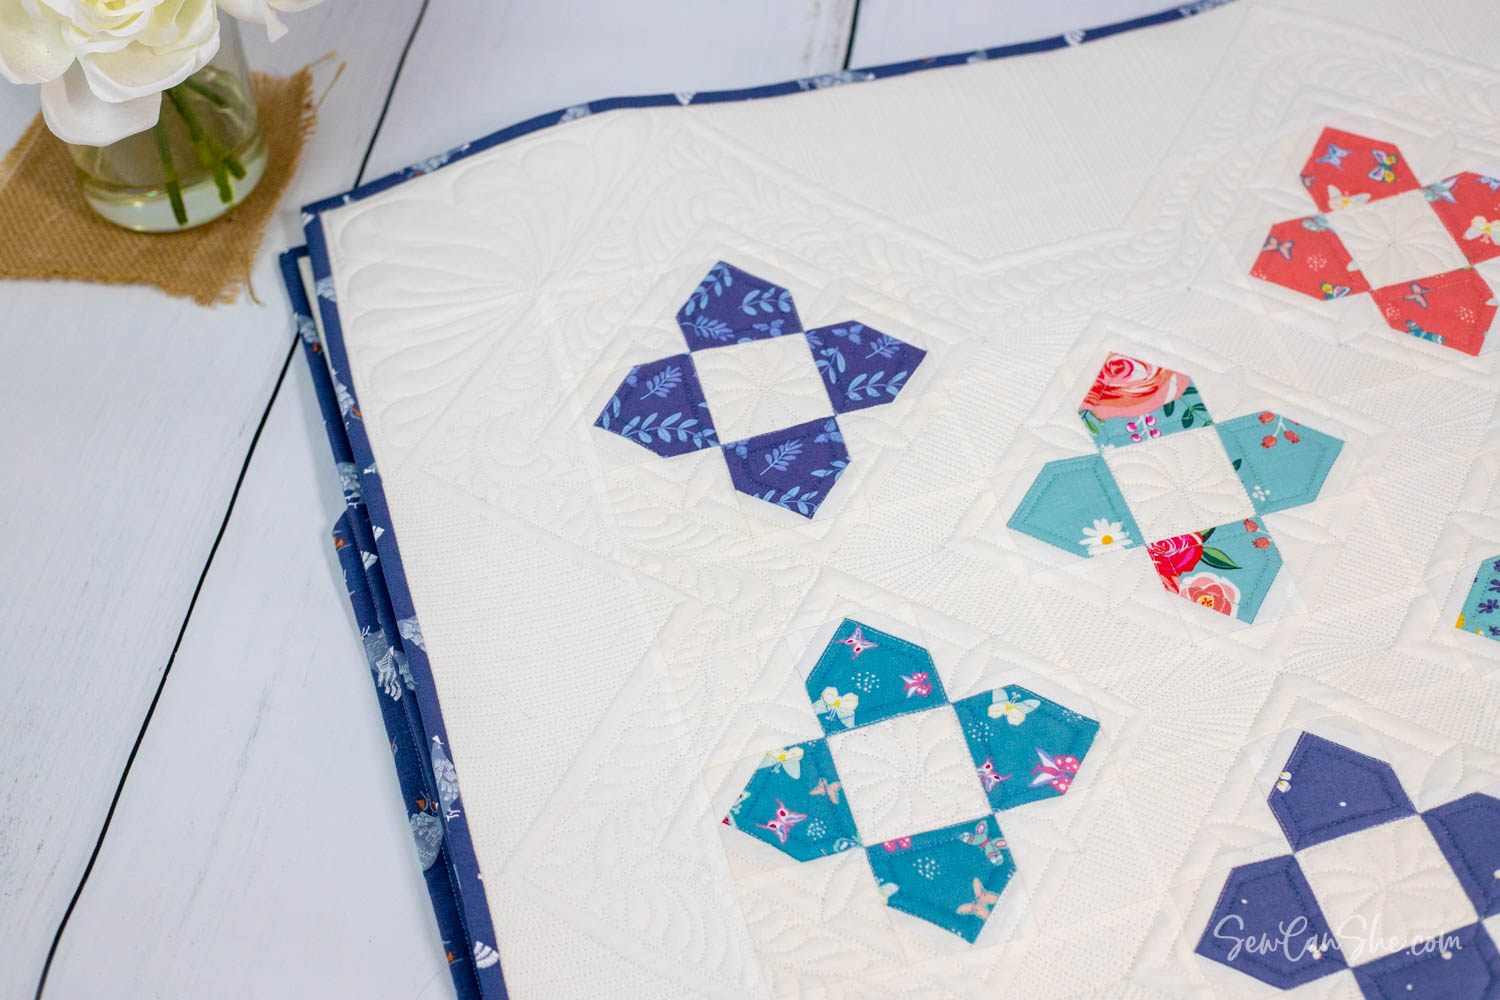
Sew a an adorable throw size quilt (or large baby quilt) using a charm bundle of your favorite cotton quilting fabrics! This fast and easy charm square quilt pattern is free in the blog post below. You’ll only need charm pack of 5” squares, so it’s easy on the budget and perfect for a beginner quilter. The Charm Poppy finished quilt size is approximately 54’’ x 50’’.
A charm square bundle is a package of pre-cut 5” fabric squares. Quilt shops often keep precut fabrics like this near the cash register to tempt you to purchase! (I know they tempt me!)
For a scrappy look, you could cut your own 5-inch squares of fabric from your fabric stash. I think cutting out 39 squares this size wouldn’t even make a dent in my scrap bin!
This blog post has been converted to an optional PDF that’s optimized for printing. Find it here. The blog post below contains everything you will need to make the charm square friendly Charm Poppy quilt and it is totally free to read, print, and sew! Just hit CTRL +P on your computer to print. The PDF download for $2 is totally optional.

I was inspired to sew this patchwork charm pack quilt after I purchased a charm bundle (or 5” Stacker of precut squares) of Poppy and Posey from Riley Blake.
The background of this quilt requires regular yardage. I used 2 3/4 yards of Kona Cotton in the color Snow.

Just like my Moroccan-inspired Enchanted Quilt Pattern (which is fat quarter friendly), each of the blocks in this quilt can be broken down into simple squares with snowball corners!

The ‘Charm Poppy’ blocks in this quilt are arranged into vertical rows that have 2” sashing strips in between each block. There is no vertical sashing, which makes this quilt even faster to sew. Every other row only has 5 blocks (instead of 6), which gives the illusion of diagonal sashing that isn’t there!

As I was using EQ8 quilt design software to imagine how this patchwork quilt would look with different background fabrics, I almost chose a pretty blue background. Here is an image of that in case you might be inspired to try a bold background fabric.
So let’s get sewing!
Charm Poppy Free Quilt Pattern Tutorial
Finished size: approximately 54’’ x 50’’.
You will need:
- 39 coordinating squares of fabric 5” x 5”*
- 2 3/4 yards of background fabric
- 1/2 yard of fabric for binding
- a piece of batting at least 62’’ x 58’’
- 3 1/4 yards of 44’’ wide fabric for the backing (or enough to piece together a backing piece at least 62” x 58”)
- Fabric marking pen or pencil
*Tips:
- Charm packs usually have 42 squares, so you’ll be able to remove your 3 least favorite pieces.
- Don’t forget you can also cut the 5” squares (or 2 1/2” squares – see below) from your scraps. It’s fine if some of the blocks repeat the same print.
Cutting:

1. Cut each charm square in half twice to make four squares, each 2 1/2” x 2 1/2”. Cut all 39 charm squares the same way, yielding 156 small squares.
*This is why you can also use 2 1/2” squares to make this quilt. If you do that, you’ll need 4 matching 2 1/2” squares for each block.
2. From the background fabric, cut:
- 312 squares 1 1/2” x 1 1/2”
- 195 squares 2 1/2” x 2 1/2”
- 32 sashing strips 2 1/2’’ x 6 1/2’’
- 6 wide sashing strips 4 1/2” x 6 1/2”
- 2 strips 4 1/2’’ x 46 1/2’’**
- 2 strips 4 1/2” x 50 1/2”**
**These are suggested measurements for the border strips. Before you cut these strips, consider using the correct method for measuring and cutting border strips.
Tip: I used my AccuQuilt Go! cutter and 1 1/2” and 2 1/2” strip dies to cut all of my background fabric squares. It was fast and easy – they show how in this video.
3. From the binding fabric, cut:
- 6 strips 2 1/2’’ x width of fabric
Sew 39 ‘Charm Poppy’ Quilt Blocks
These instructions and illustrations show how to make 1 block. Use a 1/4” (or scant 1/4”) seam allowance throughout.
Each block requires:
- 4 matching 2 1/2” x 2 1/2” print fabric squares
- 8 background fabric squares 1 1/2” x 1 1/2”
- 5 background fabric squares 2 1/2” x 2 1/2”


Optional: Use the fabric marking pen or pencil to draw a diagonal line across the back of each 1 1/2’’ background fabric square.
Tip: You don’t have to do this if you use a guide on your sewing machine such as the Sew Steady Grid Glider. It helps you align pieces diagonally so you don’t have to mark.

1. Pin a 1 1/2” x 1 1/2” background fabric square on a corner of 4 matching 2 1/2” print fabric squares.

2. Stitch along the diagonal lines.

As you can probably guess, I didn’t draw diagonal lines on my small squares, I simply used the center guideline on my Sew Steady Grid Glider to help me sew from corner to corner. I also chain pieced my squares!

3. Trim the extra fabric away 1/4’’ past the seams.


4. Open each corner and press flat.
Pin another small background fabric square on an adjacent corner. Sew the background fabric square to the corner in the same way, trim away the extra fabric and press open.
Make four matching 2 1/2” square pieces with 2 background fabric corners.


5. To make one Charm Poppy block, arrange your four matching 2 1/2” units with five 2 1/2” x 2 1/2” background fabric squares as shown above.
Sew the squares into three rows. Press the seams toward the print fabrics.


6. Sew the three rows together to finish your block!
Repeat to make 39 blocks.

Assemble the Quilt Top
I suggest laying out your Charm Poppy blocks with the sashing strips and wide sashing strips to help you decide how to arrange the blocks. A quilt design wall makes layout easy.
1. Sew 4 vertical columns that have 6 blocks and 5 sashing strips in between the blocks.
2. Sew 3 vertical columns that have 5 blocks, 4 sashing strips in between the blocks, and a wide sashing strip at the top and bottom of the column.

3. Sew the 7 columns together, alternating the columns with 6 blocks and the columns with 5 blocks.

4. Sew the side border strips to the sides of the quilt. Then attach the top and bottom border strips.
Tip: Instead of using the specified lengths for the border strips, I recommend measuring your quilt and using the actual measurements as I show in this blog post. This helps to prevent wavy quilt borders or puckering where the borders are attached.

Finishing the Charm Square Quilt
1. Cut the backing fabric in half and sew it together to make a piece big enough for the back of the quilt (at least 62” x 58”).
2. Sandwich the quilt top, batting, and backing together and baste (I like spray basting, using fusible quilt batting, or pin basting with quilter’s safety pins).
3. Quilt the quilt top as desired.
4. Cut 8 strips of binding 2 1/2’’ x width-of-fabric (or as desired) and sew them together using diagonal seams. Bind the quilt using your preferred method. See how I bind my quilts by machine here.
Was this charm square quilt pattern a great stash buster for you? Or did you use charm pack fabric? Let me know in the comments below and show me your throw-size quilt (or baby quilt) on Instagram by tagging me @sewcanshe.


